And the obsession with flowers continues. I don't understand I was such a tom boy as a child and now all I think about are flouncy, flirty, girly, fabric flowers. I blame it on the time a brick was dropped on my head and my mom thought it was hysterical...from tom boy to tutus!
Anyway here is another no sew flower. However, this one is a bit trickier because of the light weight of the fabric and the hot glue. So BE CAREFUL not to burn yourself, it if very easy. No one wants hot glue gun burned fingers!
Supplies:
Hot glue gun
Butter Knife (I used a plastic one so I didn't ruin a good one)
Small piece of felt
Chiffon (about an eighth to a quarter of a yard)
Tulle (about an eight of a yard)
Medium to large sized decorative shank button
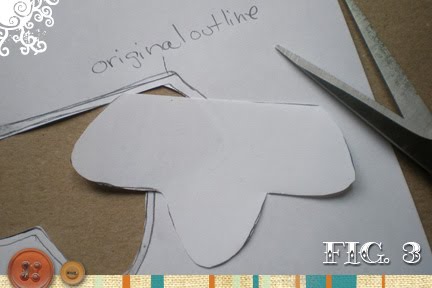
- Print out the pattern below. (Use the scale to make sure the print
out is
the correct size). Out of the felt cut one 2.5"circle. Using the square, cut 30 pieces of chiffon and 10 pieces of tulle.

- Take a square of the chiffon and fold it in half but make sure it is off center (A). Then take that half and fold it in half again (B).


- Place a dab of hot glue near the edge of the circle and place the corner of the folder petal on the glue. Using the butter knife, push down the fabric and hold it in place til it dries. Note: the knife might stick a little but the smooth surface should be easily removed from the glue leaving the petal attached to the felt backer.

- Repeat steps 2 and 3 using the chiffon to fill all around the edge of the backer. Don't be afraid to pack them in, you can always cut more fabric! After the edge is covered, repeat steps 2 and 3 using the rest of the fabric going around in circles until the felt backer is covered. To make my flower I used one circle layer of tulle right after the first outer circle. Then I continued with the chiffon to finish it up.

- Put hot glue on the back of the shank button and glue it to the center of the flower. Hold in place til the glue cools/dries.

Note: I did not make this flower into an accessory, however it would be great on a headband, as a hair clip or a pin. For ideas on different things to do with the flower refer to some of my other tutorials (
headband,
brooch,
hair clips.
Written by Kolleen Kilduff from
Design by Night