
So here's a quilt tutorial on a basic hem - no cuff, no top-stitching, just pants that don't drag and remind people that with heels you're still only 5'2" tall! Oh, and don't adjust your monitor - I was working on two pairs of pants so there's two pairs in the pictures.
You can do this with any standard mechanical sewing machine (or by hand, but that makes for a cramped thumb) using either the v-shaped hem stitch or the old-fashioned zig-zag.
Ready? Here goes!
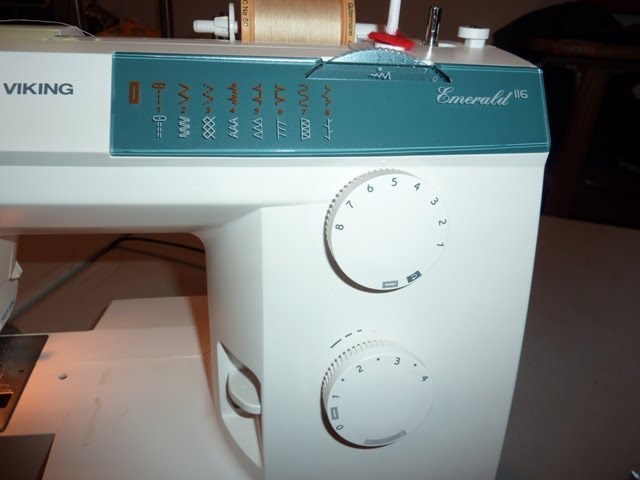 1. Stitch settings: If you look at the options on my machine you can either do this with number two - the hem stitch or number 5 - the v-shaped hem stitch.
2. Measure your trousers - in this case I was starting with a finished pair that I knew fit - turned them inside out and measured from the inseam to find the needed length.
 3. Mark the finished length - in the picture I hadn't picked out the old seam with my seam ripper yet. The ruler is lined up with the seam of the original inseam so that the marked line for my new end will be perpendicular to the manufacturers seam.
 4. Pick out your seam and press flat.
 5. Place a safety pin on the inside of the leg tube, on the line that marks what will be the bottom edge of your pants leg when finished.
 6. Fold the excess fabric up so that the raw edge is even with the hem-line mark and press.
  7. Fold the rest of the excess up so that the marked edge (with the safety pin) forms the hem and press. Then carefully pin the top folded edge (this is the bit you'll sew) to the outer fabric, but not through both layers.
 8. Carefully fold the cuff material inwards so that the fabric's right sides are together - this will leave an edge that includes the folded inner edge and the body fabric folded over on itself. What? I sew, I'm not a writer, but if you try it, it makes sense. Anyway, that's the edge you will very carefully sew. Set your stitch length and width to the largest available setting and carefully stitch so that the needle only goes through the fabric on the left stitch, on the right it should go into empty space.
Note, I'm using a walking foot, which is not cheap, but wow does it have a lot of great uses. The walking foot works with the feed dogs to help the top and bottom fabrics move through the machine evenly.
Backstitch over the beginning and end. When finished, remove the safety pins and turn the pants right side out and press.
Written by tarabu.
Written by tarabu.
3 comments:
awesome! this is super helpful. I am 5/2 and 3/8ths and I have a pile of pants to be hemmed! :)
smiles,
gina
http://hiyaluv.blogspot.com
i need to take in ada's uniform pants along the legs. i have to slim them down. can you put a tutorial up for that next? lol! thanks for the helpful post on hemming. i just wing it and it never turns out so great.
I learned how to do this last year -- with an online tutorial -- and wow! How easy! Glad you're sharing the secret here!
Laura
www.lauralaing.com
http://nostrings.etsy.com
Post a Comment